Showing posts with label cookies. Show all posts

November 17, 2011

Triple X Chocolate Cookies

Hello, I'm Liza and I am a chocoholic.

Now you.

I'll wait.

I have a cookie recipe for you, fellow chocolate lovers. It's December. Winter is in the air and the ovens are warming up for the holiday cookie rush. Now, I don't think this is a good recipe to give away as a present. Firstly because then you don't get to eat them. But also because this recipe takes a lot of time to prepare and the cookies taste best fresh. I recommend bar cookies as gifts instead, like these lovelies.

The best part is that the dough can be frozen, so you can bake a few cookies whenever you get a craving.  Thaw your frozen toes in front of the oven, while you wait for them to bake. Maybe even burning your fingertips on slightly too hot cookies you can't keep your hands off of. No judging.

I had so much fun making these. I felt like a chocolatier.

Not only will you use three types of chocolate making this, but it feels like you're making three different kinds of desserts.

Dessert 1: Hot Fudge, Dessert 2: Truffle Filling, Dessert 3: Cookies.


They're soft and sort of fold into themselves in your mouth. The nuts add a bit of crunch. Keep a shot of milk nearby. You'll need it. Trust me.

Triple X Chocolate Cookies
(Recipe from Dishing Divine via The Pastry Affair Cookbook)

Ingredients

1 cup chopped pecans
1 cup chopped walnuts
6 tablespoon unsalted butter
8 ounces bittersweet chocolate
3 ounces unsweetened chocolate
3 large eggs
1 cup sugar
1 tablespoon vanilla extract
1/3 cup all-purpose flour
1/4 teaspoon baking powder
1/4 teaspoon salt
1 1/2 cups semisweet chocolate chips
flaked sea salt(omitted)

Toast the nuts in the oven or in a pan until you can smell the nutty flavor. They should be lightly browned, not burnt.

Step 1: Hot Fudge

Coarsely chop the bittersweet and unsweetened chocolate. Separated the butter by tablespoons.

Melt the two chocolates and butter together in a double boiler, mixing to keep from burning. Let the mixture cool to room temperature before starting the next step.


Step 2: Truffle Filling

Beat the eggs and sugar together on medium speed for three minutes. Add vanilla and "hot fudge". Beat on medium for two minutes. Mix in the dry ingredients: the flour, baking powder and salt, leaving a few white streaks.


Take a large spoon and mix in the nuts and chocolate chips. It is important not to over mix the batter.

Pop the mixing bowl into the fridge for ten minutes or until the batter is firm enough to scoop.

Line a baking sheet with parchment paper.

Take another baking sheet out. Scoop out two-inch wide "chocolate truffles" making sure they do not touch. Freeze the entire tray. It should take about twenty minutes or so for the batter to firm. If you have a lot of freezer space and an extra tray, freeze more at this time.


Meanwhile, preheat the oven to 400 degrees.

Step 3: Cookies.

Now it's time to bake. If you just want a few for yourself, that's just fine. Take the amount you want out of the freezer, place on the parchment papered baking sheet and bake. After eight minutes, reduce the temperature to 350 degrees and bake for another six to eight minutes or until the cookies have a slight resistance when you press lightly on the tops. Let cool on the baking sheet for five to ten minutes.

The original recipe called for sea salt to be sprinkled on top, so add if desired. I did not and my cookies still turned out wonderfully.

If you want to make the whole batch at once, scoop and freeze another tray of batter immediately.

Freeze any remaining the cookie dough in cookie shape and store for a snowy day.


Repeat Step 3 as needed.

September 18, 2011

Chocolate Chip Cookies

What can I say? These cookies are my childhood.


These cookies were one of the first things I ever learned how to bake. My mother used to whip up the dough, measure out the chocolate chips, hand me a metal spoon, and let me mix them in. The best part of the whole process. There's nothing quite like pouring in handfuls of chocolate, slowly mixing them in, watching the buttery dough coat the chips so they start to shine. All the while the oven is warming your back and you just know that you are nine minutes away from the most important bit of all- the test cookie.

Sometimes a kid's gotta do, what a kid's gotta do.


June 16, 2011

Toffee Bars

Start with a buttery cookie base- followed with a layer of melted milk chocolate with chopped walnuts sprinkled on top. And what do you get? Toffee bars.

The sweetest kindest bar cookie on the block.

This is the cookie to make for friends, neighbors, new roommates or just people you want to impress the heck out of for minimum effort.


Why is it an impressive cookie?

1. It's easy to make, because it's not a drop cookie that is baked individually, but a bar cookie. You plop all the dough in on pan and bake it like a cake.

2. It has "layers", but isn't as complex as say-- a 7-layer bar recipe. Again, Easy-Bake Oven easy.

3. A toffee bar is not a chocolate chip cookie. Nor does it contain chocolate chips in any form. This automatically makes it an interesting alternative to the norm. And if you bring it to a block party, you avoid that awkward moment that comes from realizing you brought the same dessert as someone else. Oooh, burn.

4. Each cookie comes with a list of references, witty conversation starters and is bilingual.

5. It is composed of simple flavors that everyone enjoys, so it's bound to be a hit among all ages.

6. If you make an angel food cake or meringues with it, you can use up an excess egg yolk. Yeah. It is that awesome.

7. It's something to do during the summer with excess chocolate, (if there is indeed such a thing), besides making s'mores. Mmm...s'mores.

Toffee Bars
(makes 32 cookies)
From the Betty Crocker Cookbook
Ingredients:
1 cup butter (softened)
1 cup brown sugar (packed)
1 tsp vanilla
1 egg yolk
2 cups all purpose flour
1/4 tsp salt
2/3 cup milk chocolate chips/bar
1/2 chopped walnuts (optional)

Preheat oven to 350 degrees.

Mix together the butter, brown sugar, vanilla and egg yolk in a large bowl or mixer. Add flour and salt slowly to the mixture, stirring until combined.

Scrape into an 13x9x2 inch pan. Press down on dough gently to create an even surface. Take care that the edges are level as well.

Bake for 25 to 30 minutes. The bars should be a light brown and will still be soft.

Remove from the oven and immediately sprinkled the chocolate pieces evenly over the crust. As the heat begins to melt the chocolate spread evenly over the cookies. Add nuts to the warm chocolate.


Let bars cool completely in pan on a wire rack. Cut into 32 pieces.

Tip: If you over bake the crust, pop the cookies into an airtight container with a lid. Add a slice of bread and seal the container. Leave overnight. The toffee bars will soften.
The bread will be hard as a rock. You won't be able to save it. Sorry.
Nab a free slice of bread from your dining hall if you can. Just make sure it isn't already stale.

March 23, 2011

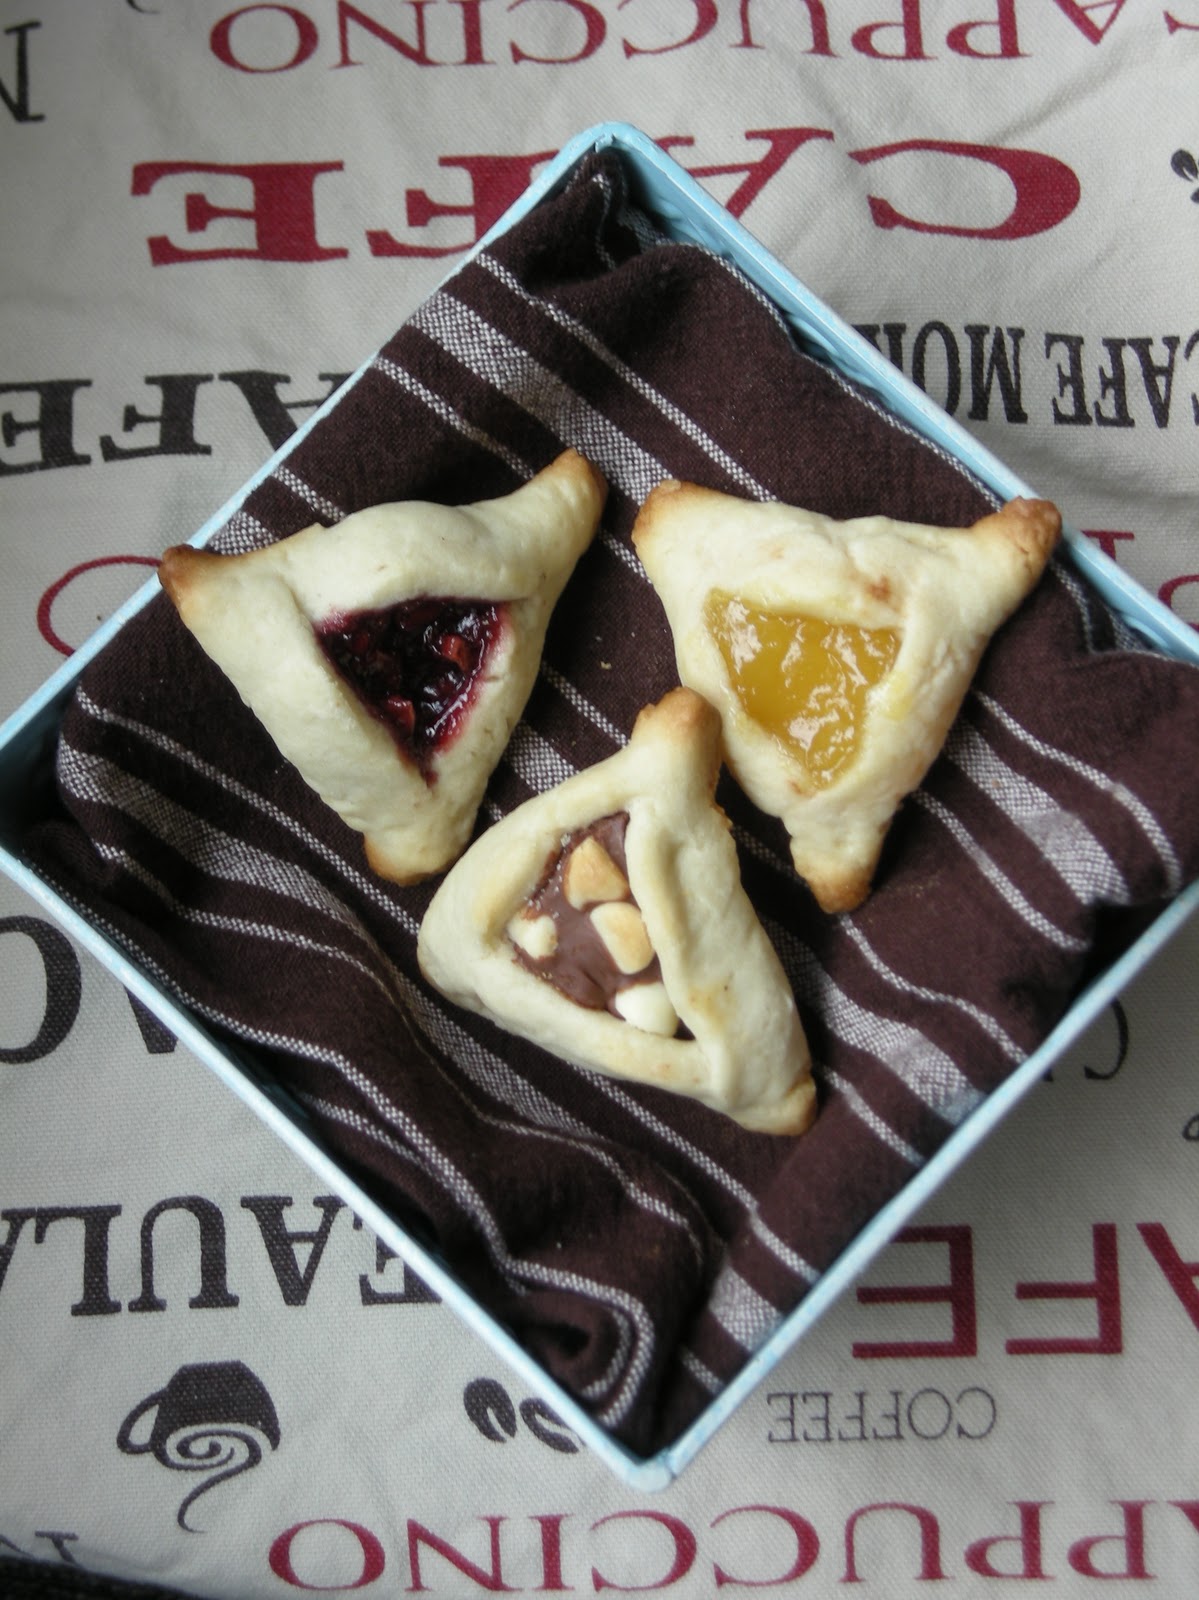
Hamantaschen- Part 1

Hamantaschen. Traditional Purim cookies. I could go on about them for hours.


If the only hamantaschen you have ever consumed came from a grocery store, drop everything and get your apron ready. It's time to make the real stuff.


Normally, what you can find in the bakery section of your local supermarket is in reality a jam cookie with a basic sugar cookie base. This is not what hamantaschen are supposed to taste like. They are actually made from a thin, flaky, slightly sweetened dough. There is a wide range of filling options, from traditional to non-traditional. And furthermore, hamantaschen are meant to be shared and enjoyed by family and friends.


Every year, my parents and I would go to a hamantaschen making party. For me, this was the highlight of Purim and an essential part of the holiday. We would walk into the house, where the dough would be sitting out on long wooden tables. The adults would roll out the dough, which had been prepared by the host, while the children ran about, impatiently waiting with glass cups to cut the circles.


When the dough was prepared, we would then busy ourselves filling as many hamantaschen as we could, with as many different flavors as possible. Chocolate would always a favorite around the younger set, as well as peanut butter, and we were determined to make as many of our favorites as possible, knowing that they could very well be eaten as soon as we turned our backs.


Our hosts and some of the adults would whisk in and out of the rooms with large baking sheets. We would fill them up quickly with cookies and pop them into several ovens. As soon as they were done, they would be placed onto cooling racks, where they would inevibly be found and devoured, warm and delicious. As many hamantaschen as we ate, there were always more.


Eventually, the remainder would be packed up and we would take our spoils home.


So many different types of hamantashen fillings. Endless possibilities. Let's get started.


Hamantashen Dough
from Jewish Holiday Kitchen
(makes enough for 24-36 depending on size)


Ingredients:
2/3 cup butter or margarine
1/2 cup sugar
1 egg
3 tablespoons milk or water
1/2 teaspoon vanilla
2 1/2 to 3 cups sifted all-purpose flour


Cream butter and sugar. Add the egg and continue mixing until smooth. Add milk and vanilla. Stir in the shifted flour until a ball of dough is formed. 


If you do not have a dough hook or a food processor to help mix the dough, roll up your sleeves and wash your hands. Add the flour a little at a time, mixing with a spoon, scraping down the sides and making sure to incorporate all the flour from the bottom of the bowl. Continue adding flour, until mixture becomes harder to work with and stick your hands right in, adding more flour until it becomes a workable dough.


Once your dough is formed chill dough 2-3 hours or overnight.


The cookies will need to bake in the oven at 375 degrees. 


Proper folding technique will be discussed in a later post, as well as different kinds of fillings, both traditional and nontraditional.


Happy Purim Everyone!

March 21, 2011

Zucchini Chocolate Chip Cookies

Ah, vegetables, what can't you make sound healthier?

This isn't the prettiest cookie in existence, although it's certainly not the ugliest. It's slightly lumpy looking and you can see flecks of a green vegetable of some sort if you stare really hard at it.

It's also soft.

And cakey.

And melts in your mouth, leaving no zucchini aftertaste whatsoever...just a strong desire for a cold glass of milk.


There are other cookies that as you chew you are able to contemplating life, the universe and all other such matters. Then you swallow, say, gosh-darn-gee-whiz, that was one decent cookie. And then you go on with your day, desire for cookie sated, not one thought of the remaining cookies wrapped in foil in your pantry in your mind, because they were "just okay".

Not these cookies my friend. Not these.

Please enjoy responsibly.

Zucchini Chocolate Chip Cookies
recipe adapted from Care2.com
(makes 24 cookies)

Ingredients:
1 egg
1/2 cup butter
1/2 cup brown sugar
1/3 cup honey
1 tablespoon maple syrup
1 cup all-purpose flour
1 cup whole wheat flour
1/2 teaspoon baking soda
1/4 teaspoon salt
1/4 teaspoon cinnamon
1/4 teaspoon nutmeg
1 cup finely shredded zucchini
12 oz chocolate chips

Preheat the oven to 350 degrees.

Shred one cup of zucchini. Set aside.

Combine flours, baking soda, salt, cinnamon and nutmeg in a large bowl.

Beat egg lightly in a small custard cup. In a separate bowl, mix together egg, butter, sugar, honey, and vanilla until a well combined liquid mixture forms.

Add wet ingredients to flour mixture. Mix. Stir in zucchini and chocolate chips.

Bake cookies on a cookie sheet for 10-15 minutes.

March 11, 2011

White Chocolate Chip Lemon Cookies

I've been gone for a bit. I know.


Forgiven me yet?

These are adapted from a recipe given to me by a friend's mother. I have yet to figure out which cookbook the cookies actually come from, however. The original called for orange zest, which also tastes wonderful. But I'm more of a lemon person myself.

These are thin cookies that are crispy on the outside and chewy and lovely on the inside.


They have white chocolate chips in them.

They are super sugary with a hint of sour.

You can spread lemon curd on them after they've cooled for extra lemony flavor.

Do it....


White Chocolate Chip Lemon Cookies
adapted: source unknown
(makes 40 cookies)

1/2 cup butter
1 cup sugar
1 egg
Grated zest of 1 lemon (or more if you like a strong lemon flavor)
1 tsp vanilla extract
1 1/2 cup all purpose flour
1/2 tsp baking soda
1/4 tsp baking powder
1/4 tsp salt
1 1/2 cup white chocolate chips


Preheat the oven to 375 degrees.

Use a microplane on the outer lemon peel, stopping when the peel turns white. Place zest in a small bowl and set aside. Measure out white chips in a separate bowl.


In a large bowl beat butter and sugar until throughly combined. Add the egg, lemon zest and the vanilla extract and mix.

In a separate bowl sift together the dry ingredients or mix carefully with a fork. Combine dry mixture with wet and add the white chocolate chips, stirring until combined.

Roll the dough into balls, flattening two inches apart on the baking sheet. They will spread thin.

Bake 8-10 minutes.

Remove from baking sheet and let cool on a rack.